|  | | | |  | |  |  | Barrel Bands in six easy steps |  | |  |  | |
 Posted: Wed Aug 22, 2007 12:41 pm Posted: Wed Aug 22, 2007 12:41 pm |
 |
|
| Alstone |
| Moderator & Site Supporter |

 |
|
| Joined: 01 Mar 2007 |
| Posts: 4139 |
| Location: Linconshire, ENGLAND |
|
|
|
Cut blank out of suitable material clamp between Chuck jaws and bore out large hole.
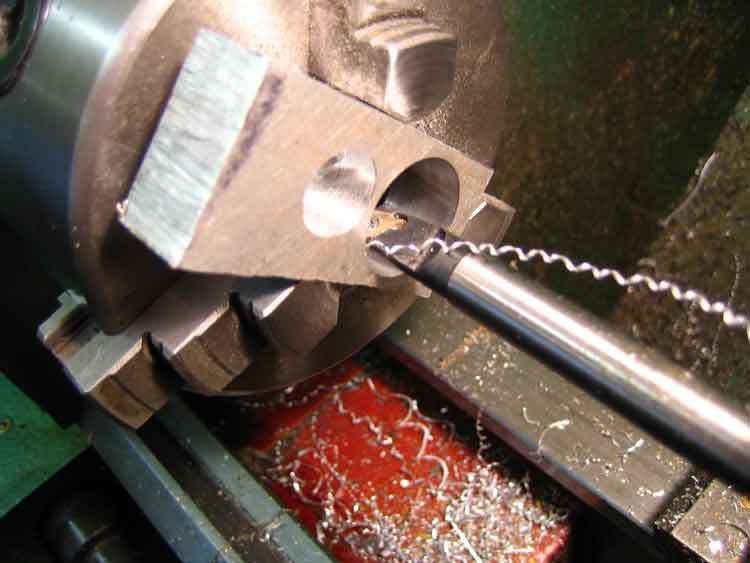
Bore out small hole
Machine sides by clamping between plates in lathe chuck
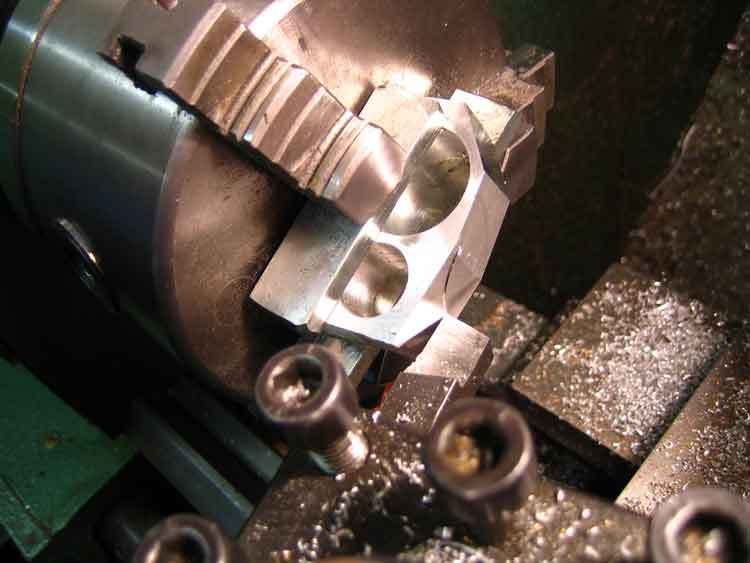
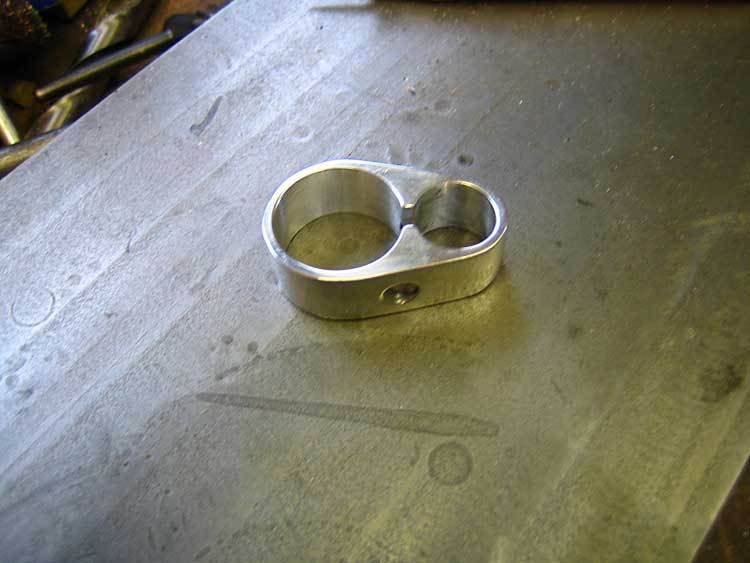
Round off corners
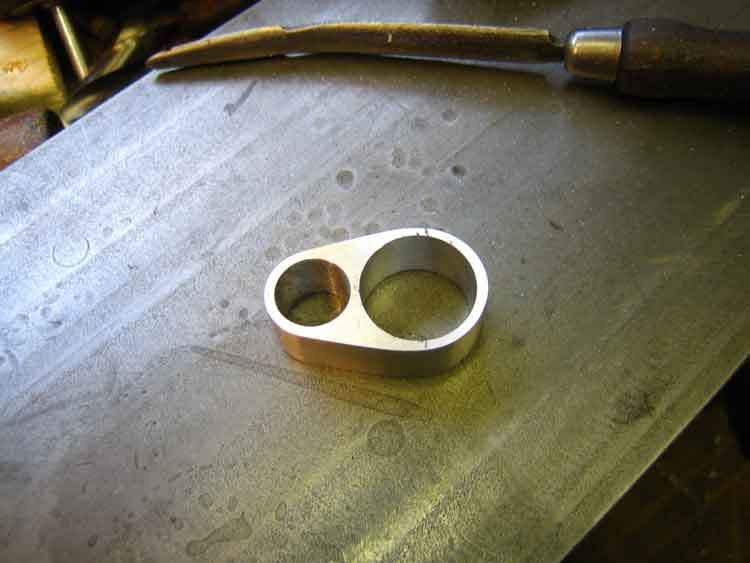
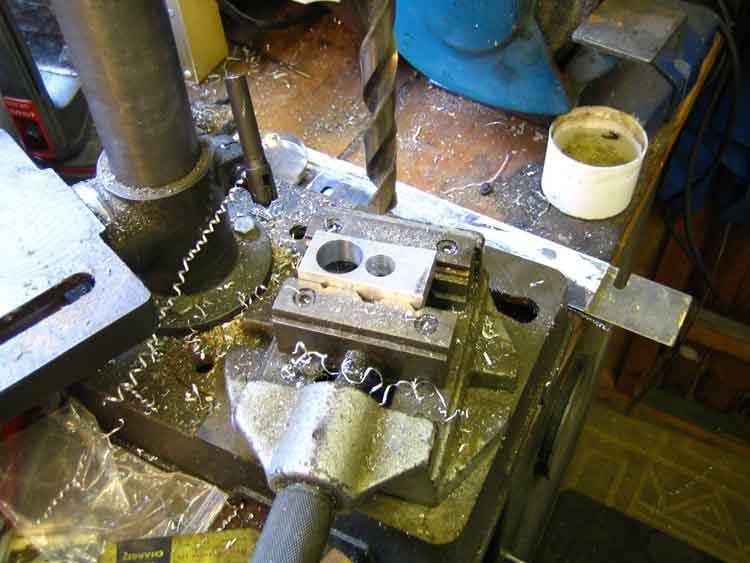
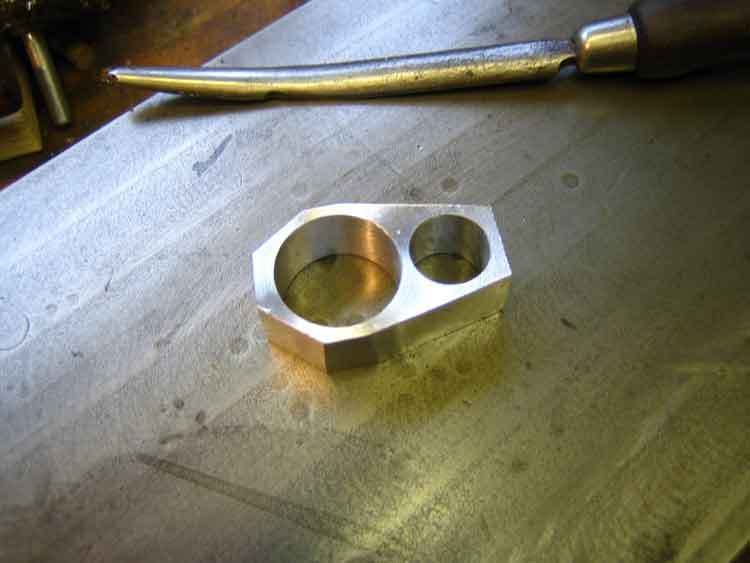
Drill screw hole and polish
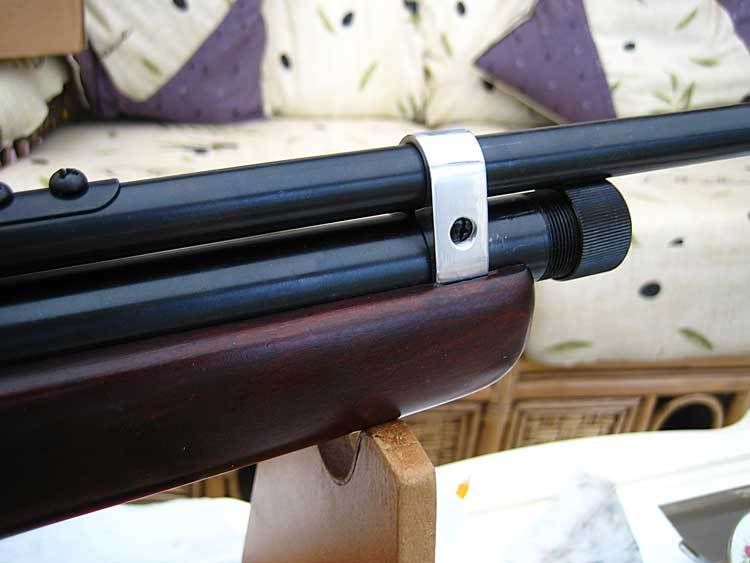
Fit to Rifle
Al |
|
|
|
|
|
|
| |  |  | | | |  |  |
| | | | | | | | | | | | | | |
| Posted: Wed Aug 22, 2007 2:18 pm |
|
|
| AirGunEric |
| Site Admin |

 |
|
| Joined: 20 Jan 2007 |
| Posts: 6908 |
| Location: "Out There" |
|
|
|
Very nice. Do you round off all the edges by hand with what appears to be that file in the background?
Also, how much play do you allow for the barrel and tube? The band screws into the tube to retain it- but is there any 'wobble' of the tubes themselves? I guess my question is, how tight do you make the holes vs. the barrel's external diameter or is there another tightening method that I can't see so the barrel doesn't slop around or vibrate? |
|
|
|
|
|
|
| | | | | | | | |
| | | | | | | | | | | | | | |
| Posted: Wed Aug 22, 2007 3:02 pm |
|
|
| Alstone |
| Moderator & Site Supporter |
|
|
| Joined: 01 Mar 2007 |
| Posts: 4139 |
| Location: Linconshire, ENGLAND |
|
|
|
Hi Eric
The holes are a good fit on the tubes,and when the screw is tightened up there is no play at all, I was thinking of putting a grub screw at the botton of the large hole and locking it up solid, but I'll leave it as it is for now.
Yes I rounded the corners off with a file and flap wheel and finished off with a buffing wheel. The item in the picture is a scraper for taking the edge off of holes. |
|
|
|
|
|
|
| | | | | | | | |
| | | | | | | | | | | | | | |
| Posted: Wed Aug 22, 2007 3:29 pm |
|
|
| StevieLaner7777 |
| Moderator |
 |
|
| Joined: 07 Mar 2007 |
| Posts: 1060 |
| Location: Herefordshire, UK |
|
|
|
Hi Al
That looks great!!
Saves having to buy one from somewhere!
Do you plan to Blue it? though now that you've polished it, it look pretty good already!
You are really tempting me to fire up the lathe and get on with making bits for my QB/XS78 Al!!
What did you use to cut out the part that divides the two holes?
I will probably ask a few more questions when I come to do mine, Only problem being is that I have all my old mans equipment But no idea  Though I think the best way to learn is to do it, So maybe I'll be on the lathe tomorrow Though I think the best way to learn is to do it, So maybe I'll be on the lathe tomorrow 
Stevie  |
|
_________________
"Who Dares Wins" - SAS 22nd Regiment Hereford. |
|
|
|
|
|
| | | | | | | | |
| | | | | | | | | | | | | | |
| Posted: Wed Aug 22, 2007 3:58 pm |
|
|
| Alstone |
| Moderator & Site Supporter |
|
|
| Joined: 01 Mar 2007 |
| Posts: 4139 |
| Location: Linconshire, ENGLAND |
|
|
|
Hi Stevie
I might have a go at bluing it but I,ve got to admit I don't get on very well bluing aluminium, it's the edges that I find a problem.
I thought the barrel bands posting might get you going on the lathe, at £15 pound each you can save a lot of money.
I used a junior hack saw to cut the slot between the holes.
Al |
|
|
|
|
|
|
| | | | | | | | |
| | | | | | | | | | | | | | |
| Posted: Wed Aug 22, 2007 4:35 pm |
|
|
| StevieLaner7777 |
| Moderator |
|
|
| Joined: 07 Mar 2007 |
| Posts: 1060 |
| Location: Herefordshire, UK |
|
|
|
Hi Al
OK I've made up my mind! I'm going to clean some serious space in the Garage tomorrow, We've just bought some kitchen units to be fitted in the kitchen, Their being stored in the garage at the moment so I'm going to have to clear some temporary space for these without damaging them.
After that I'm going to find some metal out and take the measurements for the barrel band on my QB/XS78 mark up the metal and begin machining it.
I think I will use steel to make the Barrel band because I will blue it after and also it doesn't stick to the cutting bits when it is being machined.
Cheers Al 
Stevie |
|
_________________
"Who Dares Wins" - SAS 22nd Regiment Hereford. |
|
|
|
|
|
| | | | | | | | |
| | | | | | | | | Finishing... | | | | | |
| Posted: Sat Oct 04, 2008 11:19 am |
|
|
| yourdaddyjoe |
| Supporting Member |

 |
|
| Joined: 26 May 2008 |
| Posts: 4027 |
| Location: Tatorville, USA |
|
|
|
Hey Al,
Thanks for sharing... I will give that a spin...
As for the finishing...
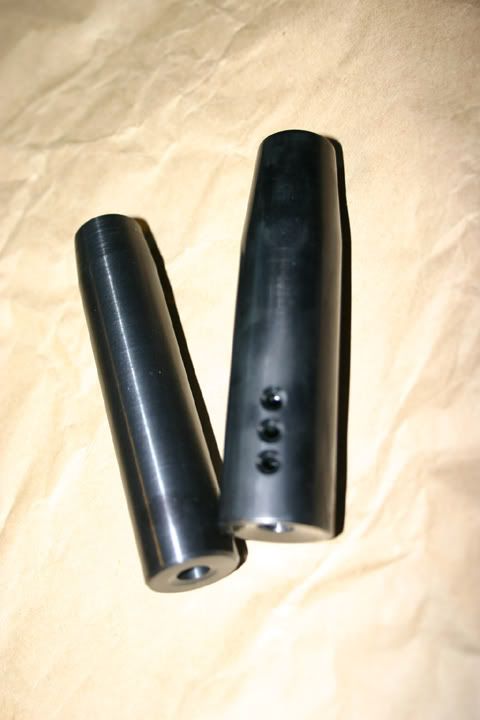
I just got my first batch back from anodizing...
One of the things I did was run a sample finish batch...
I had 3 pieces in various stages of smoothness sent in...
One of them... well lets say it turned out crappy...
Here are the two better pieces.
The one on top was fresh off the lathe,
the bottom one I wet sanded and polished before sending it in.
The one on the bottom came back with a finish much like bluing... It even shows the finger prints... he he
 |
|
|
|
|
|
|
| | | | | | | | |
Note: If you are seeing "Please enter your username and password to log in." Your browser cookies have been reset
or you need to register to access the topic in question. Use the 'Register' button near the top left of this page.
|